| |
|
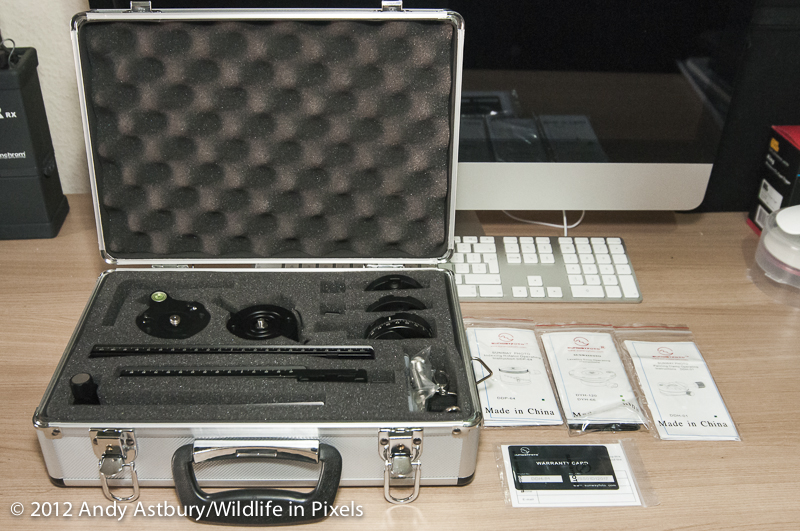 |
10 out of 10 for presentation for sure!
As you can see, it comes broken down into its component parts in a very smart, well built aluminium case.
Various warranties, instructions etc: are all in the case together with a plentifull supply of spare hex bolts and Allen keys....I can certainly think of a few manufacturers that could learn a lesson here ! |
| |
|
 |
"Tell 'em what's in the box Andy..."
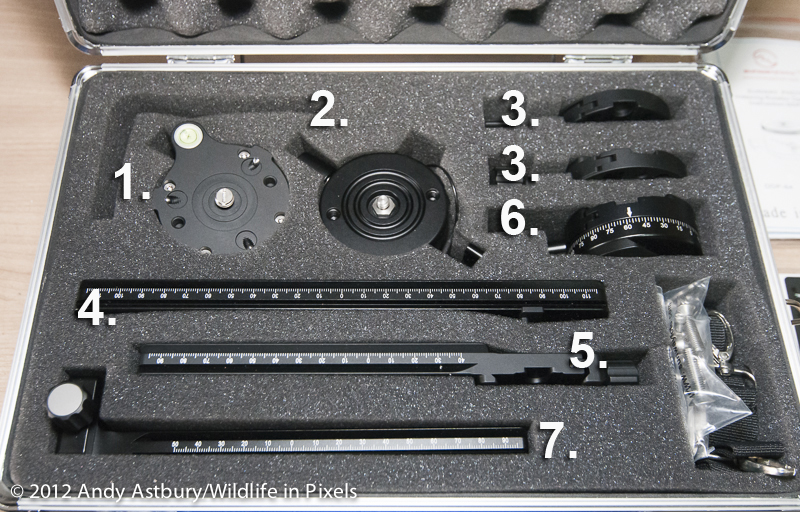
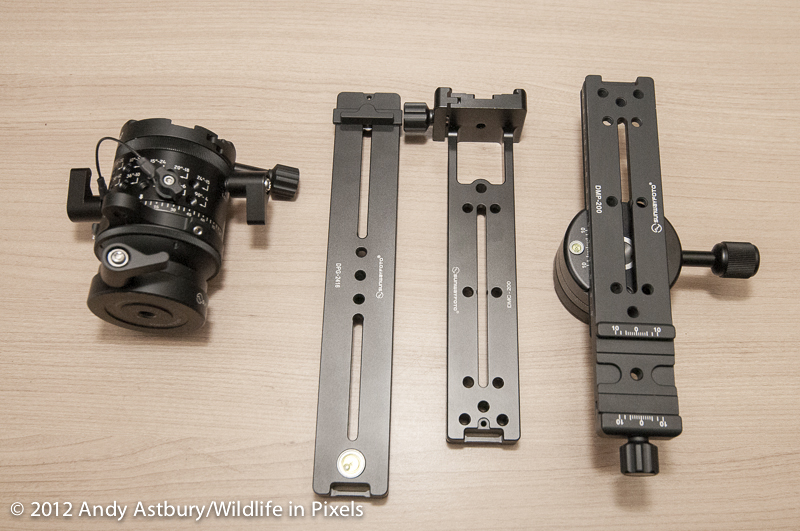
Alrighty - here's what you get:
1, Leveling Base DYH-66i×1
2, Indexing Rotator DDP-64M×1
3, Discal clamp DDY-64iL×2
4, Multi-Purpose Rails DPG-2416×1
5, Nodal Slide DMP-200×1
6, Panning Clamp DDH-01×1
7, Vertical Rail with “on-end”Clamp DMC-200×1
I presume the empty slot at the back left is for a right angle plate which I know is a component of the Pano - 1 purchase option.
Plus there's a sling strap for the case and spare screws and Allen keys in the front right corner.
|
| |
|
Assembly - now I had this together in under 5 minutes without reading the instructions (this is a review item so I didn't want to open the documentation).
But a couple of noteworthy points on assembly - you'll need one of the Allen keys, two spare bolts from the bag of spares and a medium-sized straight screwdriver - and are as follows: |
|
| |
|
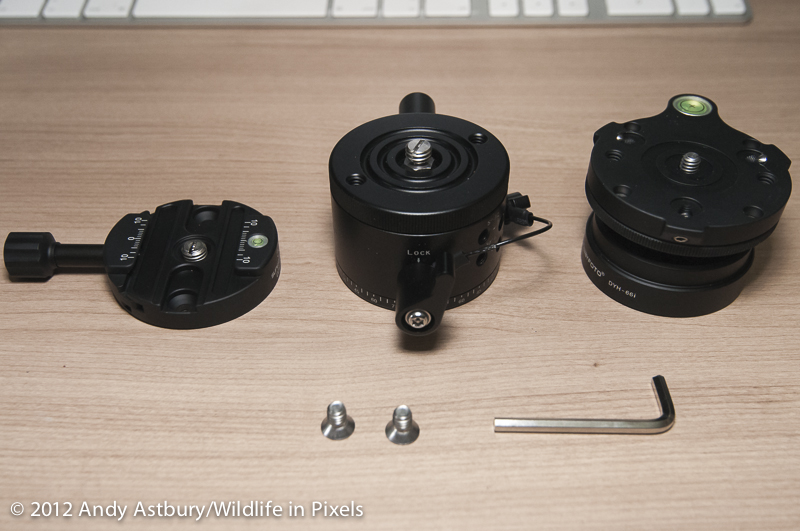 |
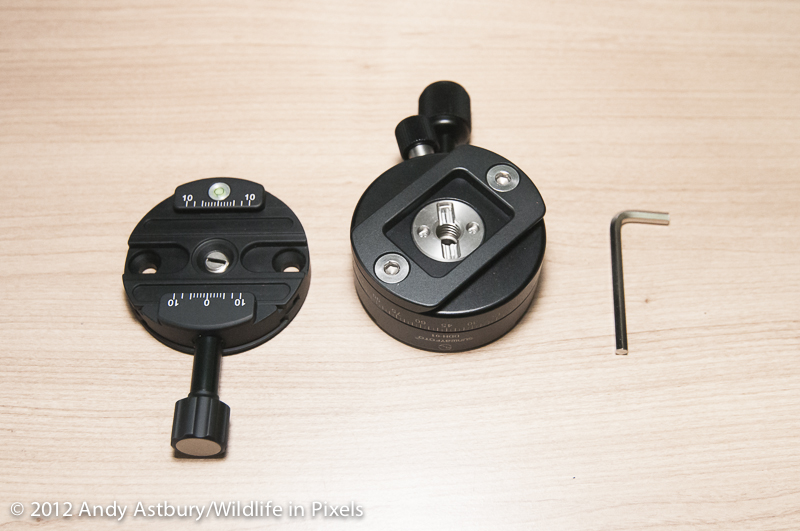
Firstly, you need to assemble the base.
On the indexing rotator there is, at least in my case, is a 1/4" Whitworth (there I go showing my age again!) to 3/8ths thread adaptor - this needs removal with a straight screwdriver.
There's another one inside the centre hole of the discal clamp that you need to fit on top of the indexing rotator - remove that too.
Then screw the indexing rotator on to the levelling base.
|
| |
|
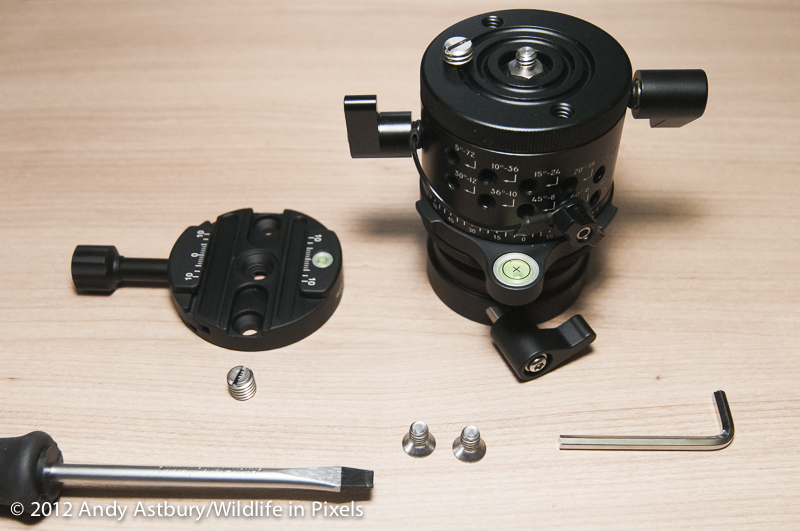 |
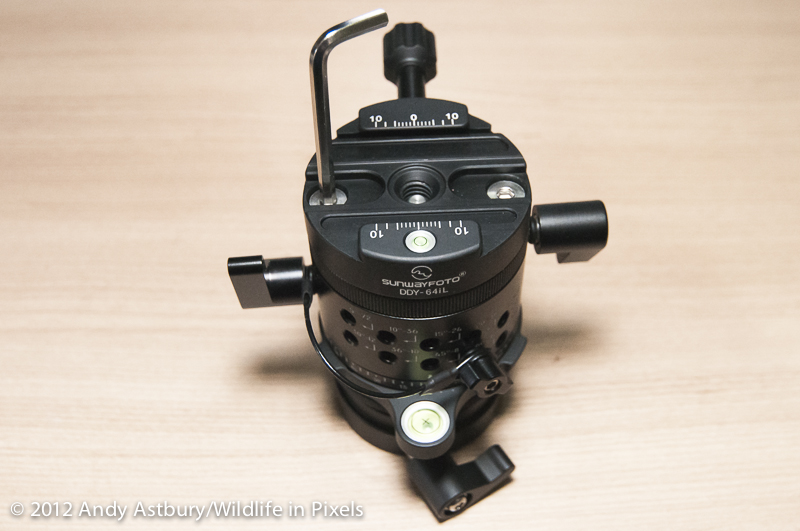
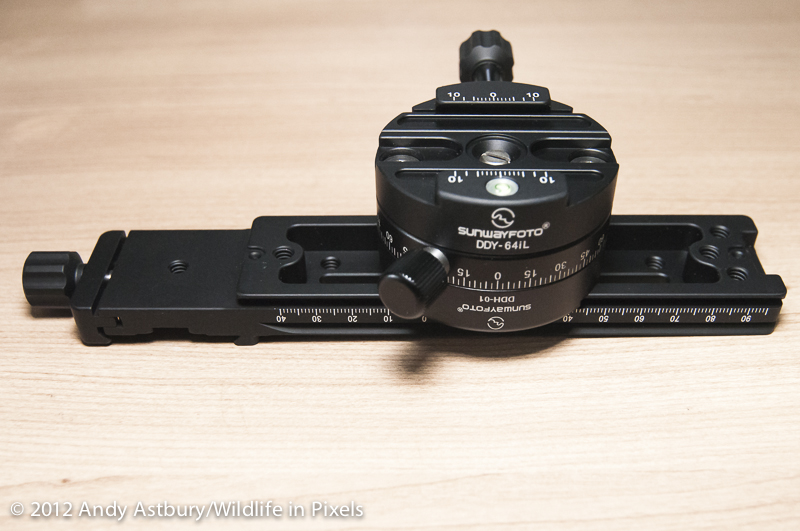
So you should end up with an assembly looking vaguely akin to this!
Keep the two thread adaptor bushings safe - you just never know when these little blighters will come in handy.
|
| |
|
 |
Then using one of the many supplied Allen keys, bolt the discal clamp to the top face of the indexing rotator.
|
| |
|
| |
|
The next bit of work comes when you assemble the other discal clamp, the panning clamp and nodal slide. |
|
| |
|
 |
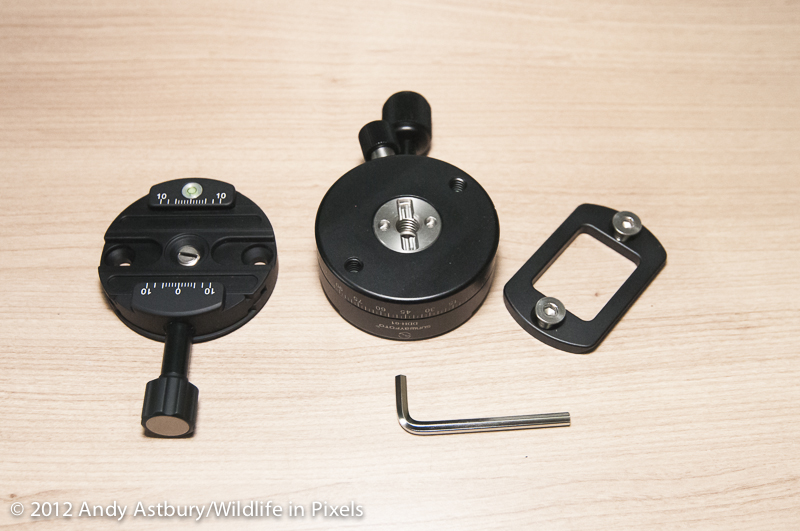
You need to remove the Arca - style dovetail from the back face of the panning clamp so you can fit it and the discal clamp back-to-back.
|
| |
|
 |
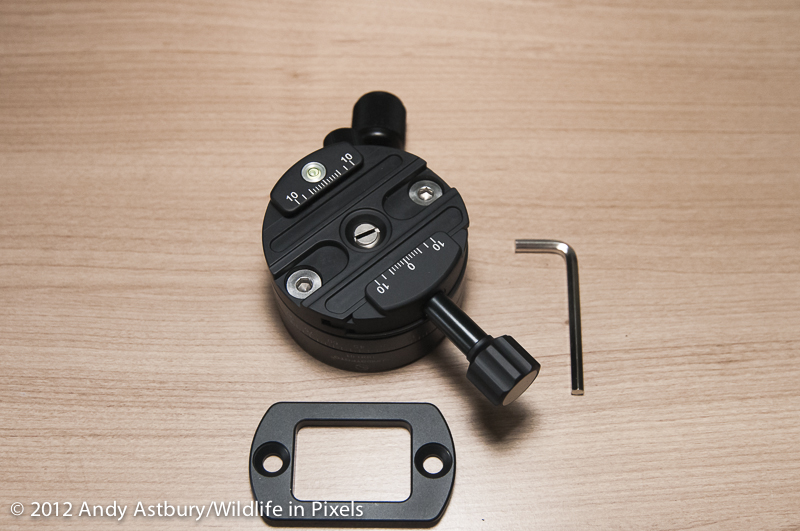
Remove this by undoing the two hex bolts with an Allen key; it might also be a good idea to remove that other thread bushing adaptor from the discal clamp, though I didn't bother at the time!
|
| |
|
 |
Using the two short hex bolts you have just removed, bolt the discal clamp to the BACK face of the panning clamp using an Allen key.
|
| |
|
 |
Then mount the panning clamp to the BACK face of the nodal slide and you are ready to go!
|
| |
|
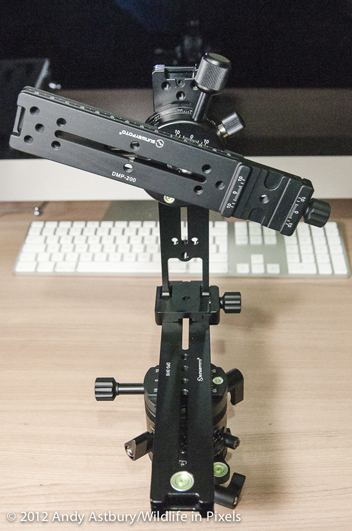 |
Slide the discal clamp to the dovetail of the vertical rail (7 in the image above) and clamp the vertical rail to the multi-purpose rail (4) then mount that to the top of the complete base unit you assembled earlier.
|
| |
|
 |
Now I don't know about you, but I had to let my man-servant "go" due to the harshness of the current fiscal climate.
I wouldn't attempt to do this total assembly in the field, or even carry it in the 'ally' case when out in all weathers; neither would I be carrying the head fully assembled and mounted on the tripod - there's too many "sticky-out-bits" to either get damaged or caught up on anything from a rock or bush, to some passing dimwit or neon-bright Kagool clad Grockle.
Nope.....I shall be breaking it down into its 4 main parts and these will reside in the old camera bag.
|
| |
|
|
Initial Thoughts |
| |
|
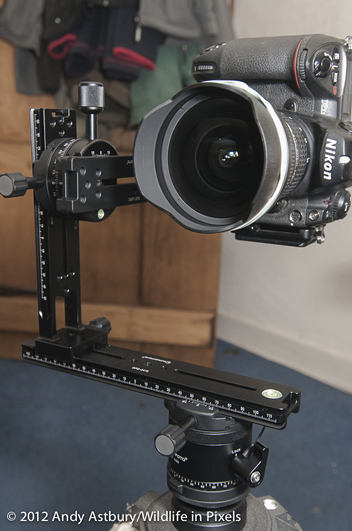 |
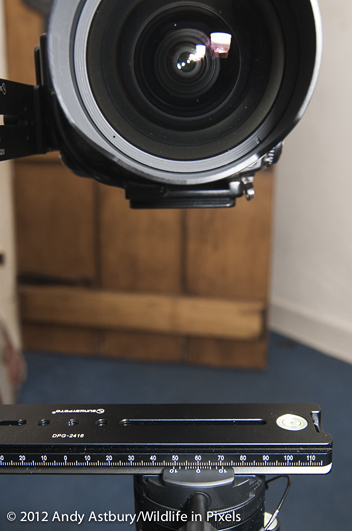
Well, a Nikon D3 with a 14-24mm f2.8 up front is heavy set up, and I'm really impressed that the whole head is firm, stable, and shows no sighn of flexing under the weight.
Setting the camera to pivot and rotate around the lenses 14mm nodal point puts the weight of the camera and lens a long way behind the pivot point of the head itself, and shifts the horizontal rail quite a way off-centre as you can see.
|
| |
|
 |
Centered for rotation pivot.... |
| |
|
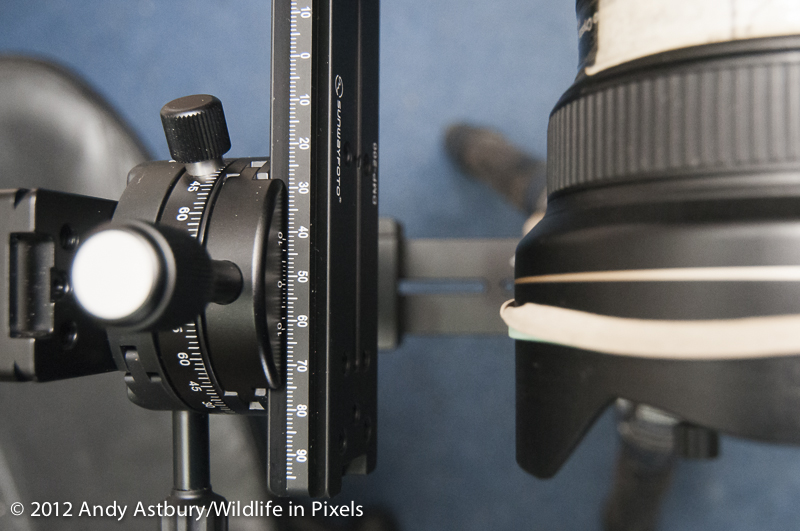 |
...and tilt pivot; the head stays rock solid without having to resort to "wellie-ing" any of the pivot clamps. |
| |
|
Overall, and at this ealy stage, I have to say that I'm very impressed with the head, both in terms of construction, and fit 'n finish.
Over the course of the winter this head is going to get some seroius testing to see how well it works with freezing cold fingers, how well it copes with cold, wet and gritty conditions, and the usual wear and tear you'd expect it to withstand - no, we're not going to be chucking it off a roof or anything daft like that, but from a build-quality aspect I will see how its components stand alongside some of its better known competitors.
So, as they say...."Watch This Space................." |
| |
|
| |
|
|
|
The Head on test (Day 1) |
| |
|
| |
|
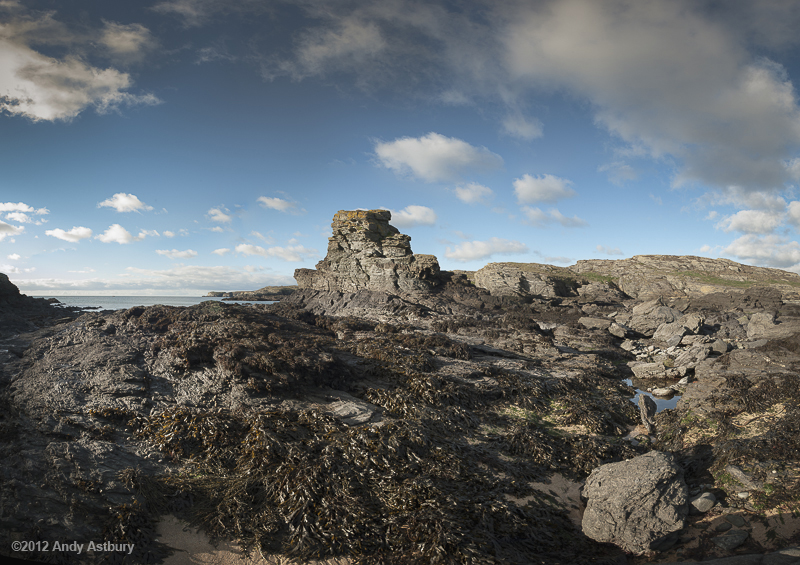 |
"Porth Y Post"
The whole point of the Pano Head...
A 2 row, 5 shot per row panorama, but each shot is a 3 shot exposure bracket; so basically 30 shots go to make up this particular image.
It's certainly not the first time I've done this type of work, but it was the easiest!
Shot at 50mm with a 50% overlap between the two rows simply done by shooting the lower row at -25 degrees and the top row at +25 degrees....
"Simples"...!
|
| |
|
| |
|
| |
|
 |
100 iso, f22, +10 stop B&W ND giving a 40 second exposure.
Indexing base "stop screw" removed, head levelled and set to 0 tilt then simply slowly rotate the pano head.
|
| |
|
| |
|
| |
|
 |
A "whip pan" 2-shot pano done with just the indexing rotator with the "stop screw" removed, leveling base and nodal rail.
|
| |
|
| |
|
| |
|
 |
Shot just using the leveling base, indexing rotator and discal clamp assembly as a "ball head" of sorts, together with the nodal slide.
|
| |
|
| |
|
| |
|
Full.jpg) |
Shot as above with just the lower portion of the pano head assembly.
|
| |
|
| |
|
| |
|